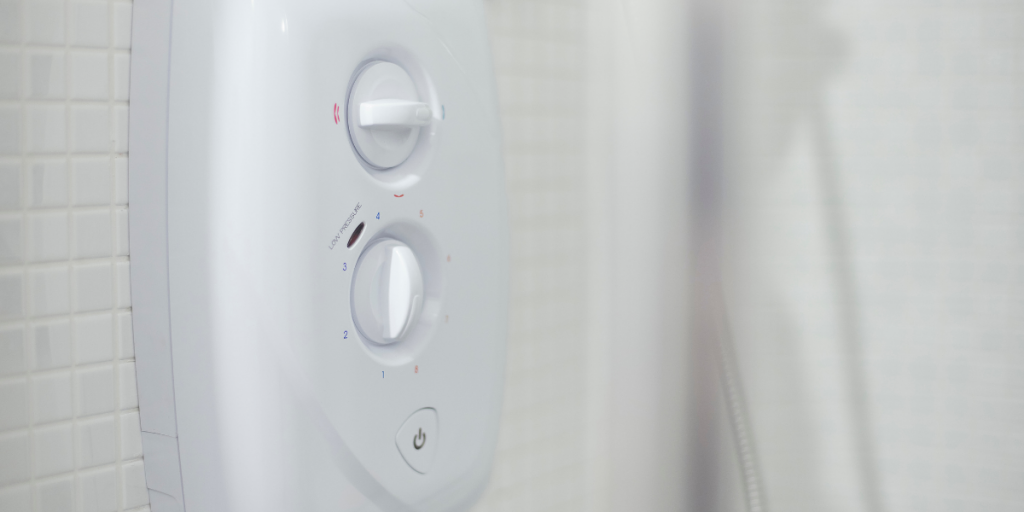
The shower is the focal point of most bathrooms. It is also an integral part of most people’s morning ritual. But how is a shower installed? If you have shopped for a replacement (or new) shower, it is likely that you noticed there are many different types available—from the modern mixer showers to the conventional electric shower.
Understandably, there are different requirements when installing various showers. To minimise confusion, we’ll focus on the installation of electric showers. Install your electric shower with utmost ease by keeping this handy guide in mind.
Best Water Pressure for a Shower
A low-pressure water system can offer a vast array of shower options including digital showers, electric and power showers, and mixer showers. Most of them are suitable given the right pressure is achieved.
If you have a high-pressure system, you will also have a higher flow rate. In similar cases, getting larger shower heads would be a good idea. High-pressure water systems also work well with electric, mixer, or digital showers, even without a pump installed.
Showers and Water Systems
If you own a gravity-fed system, you have the luxury to use most showers. For instance, you can install an electric, power, or mixer shower (with or without the pump).
If you have a combination boiler (also known as combi boiler), or if your cold water is sourced from the mains, recommended options would be an electric shower or a mixer shower.
How to Install an Electric Shower
An electric shower can be fitted directly in a cubicle or over your bath. Either way, you just need to ensure there is enough room around the shower to remove the front covering in case servicing is required.
Depending on the model you’ll purchase, the water supply can enter from the bottom, top, or from behind. Check the manufacturer’s instructions so you will have enough cable to connect to the terminal block.
Pipework
- Run a 15mm pipe from the cold water supply situated near your storage tank to the wall where you intend to fit the shower.
- Hold the shower unit in place so you can mark its position for the power supply cable and the inlet pipe. You can use a pencil to mark the wall.
- Use a cable detector and pipe to examine if there are no hidden electric cables or pipes in the wall before drilling. Otherwise, you might put yourself in danger or do considerable damage to your home.
- From there, you can run the pipe through the wall.
Electricity Supply
- Once the pipework has been fitted, drill a hole in the wall for the electric cable. (Important: the size of the cable usually depends on the kilowatt rating of the shower unit so check the manufacturer’s instructions at all times).
- Run a cable from the shower unit position to the ceiling-mounted pull-cord switch.
- The switch should have an on/off indicator. It is also important that the switch is not positioned in hazard zones 1 or 2.
- An electric shower will require a dedicated circuit which has to be fitted by an qualified electrician for the final connection.
- The electric shower’s circuit needs to also be protected by a residual current device or RCD.
Note: An RCD is designed to break an electrical circuit to avert any serious harm from an electric shock. It works by automatically disconnecting a circuit when it detects the electric current is not balanced.

The Fitting Process
Drilling the fixing holes
Hold your shower units in position while you mark the fixing holes using a pencil. Drill the holes you have marked using a masonry bit. After fitting wall or rawl plugs, squeeze silicone sealant onto each one.
Feeding the supply and screwing into place
Feed the electric cable and the water supply pipe through the shower unit’s backplate. From there you can screw the shower unit’s back to the wall.
Connecting the pipe
Connect the water pipe to your shower unit. To tighten the compression fitting, use a wrench.
Connecting the cable
Once the water pipe is connected, you can now proceed to connecting the electric supply. Connect the neutral and live cores to the terminals marked “load.” Connect the earth core to the earth terminal after.
Fitting the cover
Refer to the manufacturer’s instructions when fitting the cover of your shower. Also, ensure the rubber seal is in place so water does not get into the shower unit and cause damage.
Fitting the shower rails
When fitting the shower riser rails (the one that supports the shower head), ensure it is installed high enough so the shower head is not below anyone using it. Ensure the shower head also hangs properly so water does not fall elsewhere when the shower is switched off.
Attaching the hose
To attach the shower hose, screw one end of the hose to the handset and include any washers and attach the shower’s other end. Once done, you can turn the water supply on and test everything.
Over to You
Need your shower installed or repaired but don’t have the time or the technical know-how necessary? We can help! We also have lots of showers for you to choose from, so get in touch with us and together, we’ll pick the option that’s best for you!

